Azure IoT Hub test data using Particle Internet Button
Particle internet buttons as IoT hub test data source.
Use a Particle internet button to create test data for your Azure IoT projects ...
Context
On one of my recent IoT projects I needed a quick way to interact with IoT Hub to create test occupancy and temperature data. That was what fitted best my scenario but feel free to adapt this to your needs.
I recycled an unused Internet button once used for tracking (DevOps) builds, by setting up simple button clicks to:
- publish an event as occupied or available to the iot hub
- publish changes of temperatures to the IoT (increment temperature between two thresholds easily and update the LEDs to confirm)
In short...
The basic idea is to use the internet button sample that publishes different events on some of the button clicks and use the integration to send a custom payload.
So you can click the different available buttons to trigger different payloads of test data
Set up your device
To get started quickly with the most basic implementation, simply:
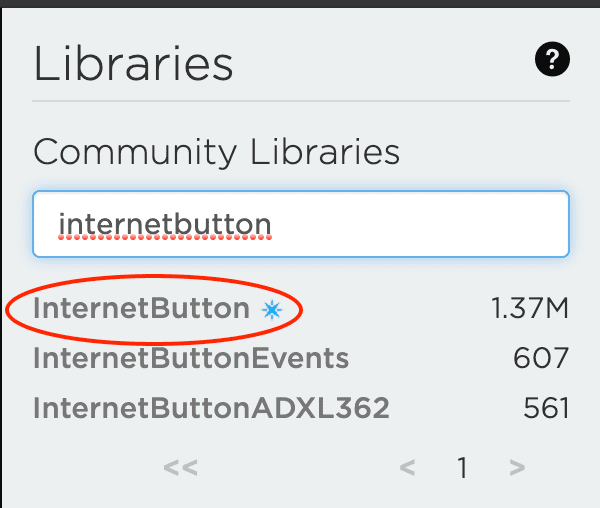
- look for the InternetButton library on the Particle Cloud (using https://build.particle.io)
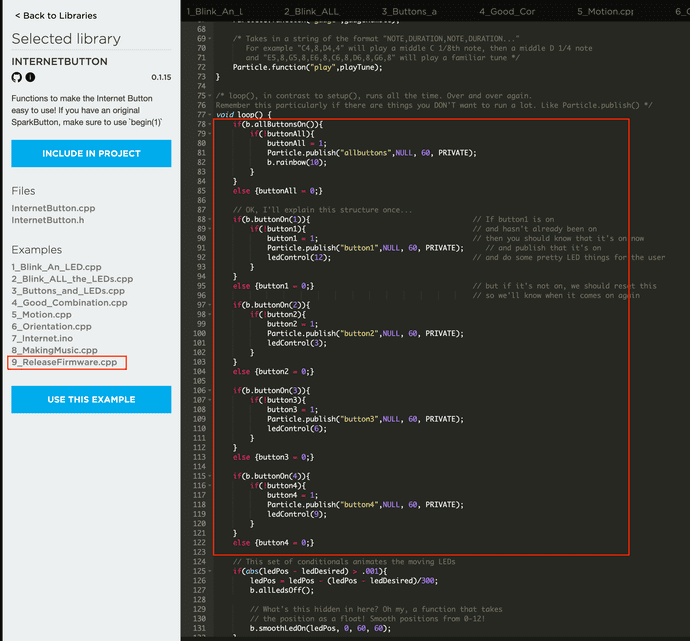
- select the most "advanced" example (basically the last one number 9) - and flash it to your device.
Configure the integration to IoT Hub
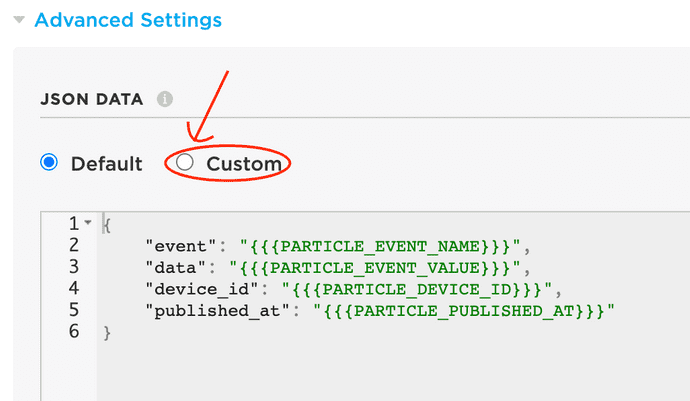
You can set whatever payload you want using handlebars (see here for more documentation).
Set the integration payload
Use it to set static or dynamic properties.
Static payload
In the following example, IsOccupied is set to always send true. You could consider sending false when clicking another button such:
- button1 -> occupied
- button3 -> free
{
    "event": "{{{PARTICLE_EVENT_NAME}}}",
    "data": "{{{PARTICLE_EVENT_VALUE}}}",
    "device_id": "{{{PARTICLE_DEVICE_ID}}}",
    "published_at": "{{{PARTICLE_PUBLISHED_AT}}}",
    "IsOccupied": true
}
Dynamic payload
You could also customise the code to change a temperature property before it publishes an event such as:
- button2 -> decrement temperature by 1 degree and then publish
- button4 -> increment temperature by 0.5 degree and then publish
You would then use a similar json data template to this:
{
    "temperature": "{{{temperature}}}"
}
If you are going to be handling json, I would recommend using ArduinoJson and publish using that json data. Checkout the examples for ways on how to use it - I personally used this article to get started quickly.
Video
I go through that process in that video if that helps.
So...
- The above is a flexible base. We are giving a temperature or occupancy example, but you could also use it for any types of gauge simulation (battery level, signal strength, fuel tank level etc...)
- If you are working with third parties, you can easily simulate their payload via the Particle Cloud integration interface
You probably have all sort of test data generators lying around but I found this very practical for quick tests to check everything is going as expected, and simulating predefined sensor data during demos for perfectly times effects.
Written by Dan Benitah, London, UK.


